
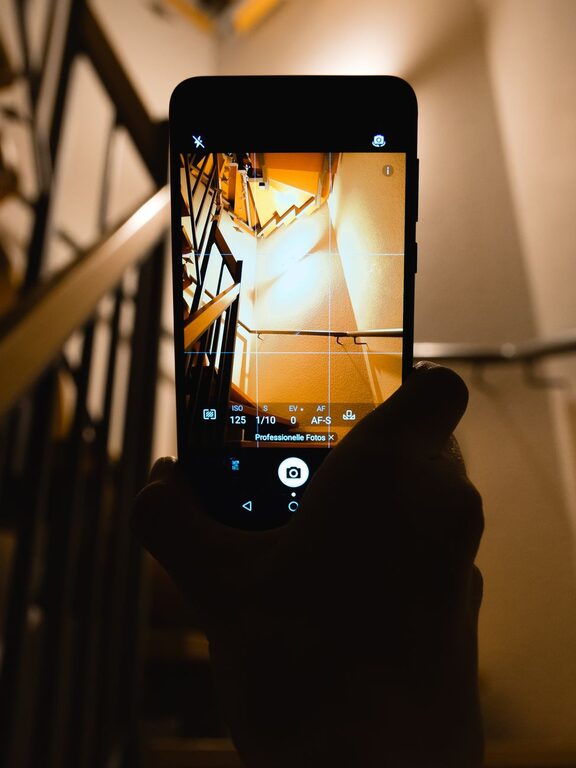
Taking better photos with your phone does not require expensive equipment or advanced editing skills. A few simple habits can make a noticeable difference in the sharpness, lighting, and composition of your pictures.
Whether you are photographing people, food, pets, travel scenes, or everyday moments, your phone already has many useful tools built in. The key is learning how to use them thoughtfully.
Keep Your Camera Lens Clean
One of the easiest ways to improve your phone photos is to clean the camera lens regularly. Fingerprints, dust, and smudges can make images look hazy or less detailed.
Before taking an important photo:
– Wipe the lens with a soft, clean cloth.
– Avoid using rough materials that could scratch the glass.
– Check the lens again if your photos look unusually blurry or foggy.
A quick wipe can make colors look clearer and light sources appear less cloudy.
Pay Attention to Light
Light has a major effect on every photo. When possible, use soft, natural light instead of harsh overhead lighting or a bright flash.
For indoor photos, try moving closer to a window. Turn your subject toward the light rather than placing the window directly behind them. This can brighten the subject and help preserve details.
Outdoor light changes throughout the day:
– Early morning and late afternoon often provide soft, warm light.
– Midday sunlight can create strong shadows.
– Overcast skies create even, gentle lighting that works well for portraits and outdoor scenes.
If the light is too strong, look for shade. A shaded area can reduce harsh shadows and make the photo more balanced.
Tap to Focus
Your phone usually chooses what to focus on automatically, but it may not always select the most important part of the scene. Tap the screen on the subject you want to appear sharp.
This is especially helpful when:
– A person is standing in front of a busy background.
– You are photographing a small object.
– The scene includes several subjects at different distances.
– You are taking a close-up photo.
After tapping, watch the screen to make sure the subject looks clear before pressing the shutter button.
Many phones also let you adjust brightness after tapping. If the image looks too dark or too bright, drag the exposure control up or down until the lighting looks more natural.
Hold Your Phone Steady
Small movements can make photos look blurry, especially in low light. Hold your phone with both hands and keep your elbows close to your body.
You can also improve stability by:
– Leaning against a wall or table.
– Resting your phone on a solid surface.
– Using the volume button as a shutter button.
– Taking several photos and choosing the sharpest one.
– Waiting a moment after pressing the shutter before moving.
A phone tripod is useful for group photos, landscapes, and timed self-portraits, but you can often get good results without one.
Improve Your Composition
Composition is the way elements are arranged within a photo. You can create more appealing images by thinking about placement before taking the picture.
One helpful technique is the rule of thirds. Imagine the screen divided into nine equal sections using two horizontal and two vertical lines. Place the main subject along one of these lines or near an intersection.
Most camera apps can display a grid to help with this. Look in the camera settings for an option such as “Grid” or “Composition guide.”
The rule of thirds is useful, but it is not a strict requirement. Centered compositions can work well when the subject is symmetrical or when you want a direct, simple image.
Look for Leading Lines
Leading lines guide the viewer’s eyes through a photo. They can make an image feel more organized and give it a sense of depth.
Examples include:
– Roads and sidewalks.
– Fences and railings.
– Hallways and rows of buildings.
– Rivers, shadows, or table edges.
Before taking a photo, notice where these lines begin and where they lead. Position yourself so they point toward the main subject when possible.
Change Your Viewpoint
Many phone photos are taken from eye level. Changing your position can make an ordinary subject look more interesting.
Try taking photos:
– From a lower angle.
– From above.
– From the side.
– Through a doorway or window.
– From farther away, using the surroundings as part of the image.
Move your feet instead of relying only on digital zoom. Walking closer often produces a clearer photo, while digital zoom can reduce detail and make the image look soft.
Use Portrait Mode Carefully
Portrait mode can blur the background and draw attention to a person or object. It works best when the subject is separated from the background and there is enough light.
For better results:
– Keep the subject a reasonable distance from the background.
– Avoid very complicated edges, such as thin branches or loose hair.
– Check the entire frame before taking the photo.
– Make sure the phone has clearly detected the subject.
Portrait mode is not always the best choice. For groups, scenery, or subjects with unusual shapes, the regular photo mode may look more natural.
Avoid Overusing the Flash
The built-in flash can help in very dark conditions, but it may create harsh shadows and unnatural colors. Before turning it on, look for another light source or change your position.
You can also try night mode if your phone offers it. Keep the phone steady while the image is being captured, since night mode may take a little longer to process the photo.
Night mode works best for still subjects. Moving people or objects may appear blurred if they shift during the exposure.
Take More Than One Photo
Even experienced photographers take multiple photos of the same subject. A person may blink, a pet may move, or the light may change between shots.
After taking several images, review them carefully and keep the strongest one. Look for:
– Sharp focus.
– Natural expressions.
– Balanced lighting.
– Clean backgrounds.
– Unwanted objects near the edges.
Deleting extra images also makes it easier to find and enjoy your best photos later.
Keep Backgrounds Simple
A distracting background can take attention away from the main subject. Before pressing the shutter, scan the edges of the frame for clutter, bright spots, signs, or objects that appear to grow out of someone’s head.
You can simplify the background by:
– Moving to a different position.
– Asking the subject to take a step forward.
– Using a plain wall.
– Framing the subject against open sky or soft natural scenery.
– Getting closer to fill more of the frame.
A simple background often makes a photo look more polished.
Edit With a Light Touch
Small edits can improve a photo, but heavy editing may make it look unnatural. Use your phone’s built-in editing tools to make gentle adjustments to brightness, contrast, color, and cropping.
Start by correcting the overall image:
- Crop out distracting edges.
- Adjust brightness if needed.
- Balance highlights and shadows.
- Add a small amount of contrast.
- Check that colors still look realistic.
- Save a copy before making major changes.
Try not to apply the same filter to every photo. Different scenes may need different adjustments, and natural-looking edits usually remain appealing for longer.
Practice With Everyday Subjects
You do not need a special trip or professional subject to improve. Practice with items and scenes around you, such as a cup of coffee, a houseplant, a pet, or a view from a window.
Challenge yourself to photograph the same subject in different lighting and from several angles. Then compare the results and note what changed.
The more you practice, the more quickly you will notice good light, interesting angles, and distracting details. Over time, these choices will become more natural.
Better phone photography comes from careful observation more than complicated equipment. Clean the lens, use available light, keep the phone steady, and take a moment to consider the composition. With a little practice, everyday moments can become clearer, more balanced, and more memorable photos.